Modernizing your bathroom with new fixtures can dramatically enhance both the functionality and aesthetic appeal of this essential space. As bathroom technology continues to evolve, homeowners are presented with an exciting array of options that blend style, efficiency, and innovation. From smart showers to wall-mounted toilets, today’s fixtures offer unprecedented levels of comfort and convenience. However, proper installation is crucial to ensure these high-tech additions perform as intended and stand the test of time.
Understanding the intricacies of modern bathroom fixture installation is key to achieving a successful renovation. This process involves more than just swapping out old hardware; it requires careful planning, precise measurements, and a solid grasp of both plumbing and electrical systems. Whether you’re a seasoned DIY enthusiast or working with a professional contractor, being well-informed about the latest installation techniques and considerations can help you make better decisions and avoid costly mistakes.
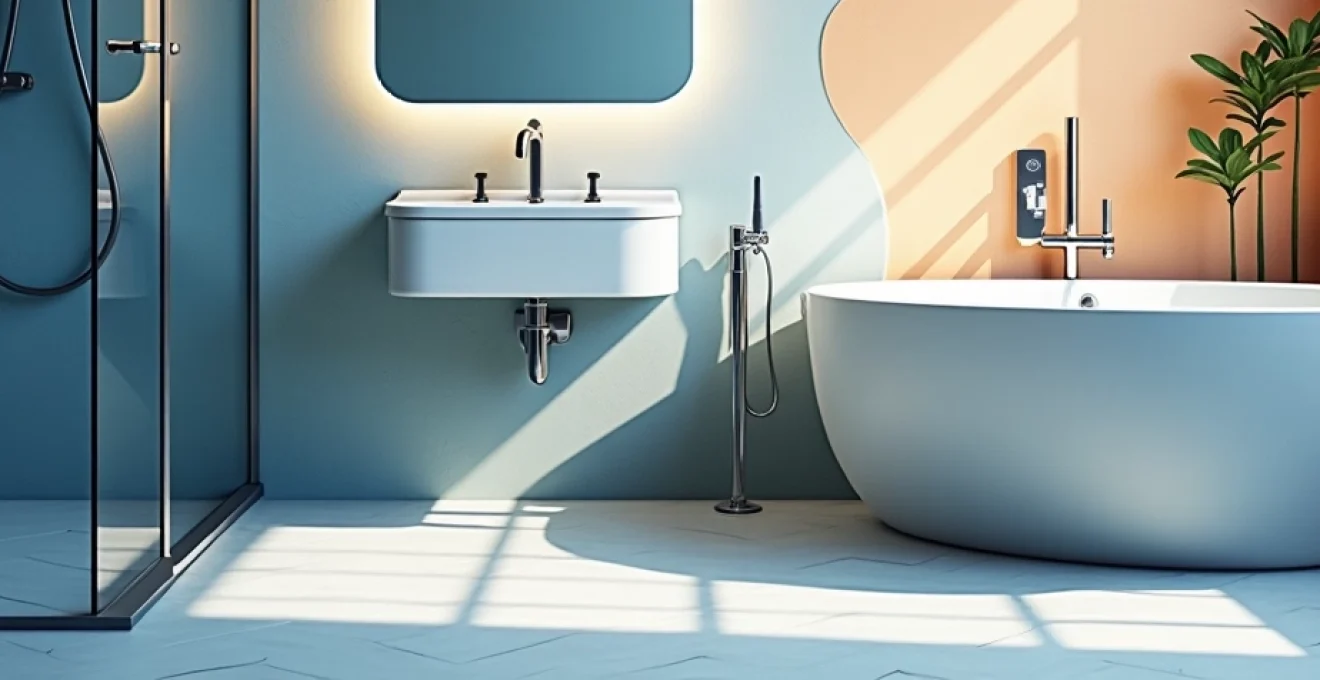
Bathroom fixture selection: materials and efficiency standards
When selecting modern bathroom fixtures, it’s essential to consider both aesthetics and performance. Today’s market offers a wide range of materials, each with its own benefits and drawbacks. Stainless steel fixtures, for instance, are durable and easy to clean, making them ideal for high-traffic bathrooms. Ceramic fixtures, on the other hand, offer a classic look and are available in various colors to match any decor scheme.
Efficiency standards have become increasingly important in fixture selection. WaterSense labeled products, certified by the Environmental Protection Agency, use at least 20% less water than standard fixtures without sacrificing performance. When choosing toilets, look for models with dual-flush technology, which can significantly reduce water consumption. For showerheads, consider those with flow rates of 2.0 gallons per minute (GPM) or less, which can provide a satisfying shower experience while conserving water.
Modern faucets often incorporate aerators, which mix air with water to maintain pressure while reducing flow. Some advanced models even feature touchless technology, activated by motion sensors, which not only conserves water but also improves hygiene. When selecting these fixtures, pay attention to the finish as well. PVD (Physical Vapor Deposition) finishes are known for their durability and resistance to tarnishing, making them an excellent choice for long-term use.
Choosing fixtures that balance style, functionality, and efficiency is crucial for creating a modern bathroom that stands the test of time.
Pre-installation plumbing considerations
Before diving into the installation of new fixtures, it’s crucial to assess and prepare your bathroom’s plumbing system. This preparatory phase can prevent future issues and ensure your new fixtures function optimally. Let’s explore some key considerations:
Water pressure assessment and adjustment techniques
Proper water pressure is essential for the efficient operation of modern fixtures. Too low pressure can result in weak showers and slow-filling toilets, while excessively high pressure can cause leaks and damage to fixtures over time. Use a pressure gauge to measure your home’s water pressure, which should ideally be between 40 and 80 psi (pounds per square inch).
If adjustments are necessary, consider installing a pressure regulator or booster pump. For homes with low pressure, a booster pump can increase flow to meet the demands of modern fixtures. Conversely, if pressure is too high, a regulator can be installed to reduce it to a safe and efficient level.
Pipe material compatibility: PEX vs. copper vs. PVC
When updating your bathroom plumbing, it’s crucial to consider the compatibility of existing pipes with new materials. PEX (cross-linked polyethylene) tubing has become increasingly popular due to its flexibility, durability, and ease of installation. It can be connected to existing copper or PVC pipes using appropriate fittings.
Copper pipes, while more expensive, offer excellent durability and are naturally antimicrobial. PVC (polyvinyl chloride) is cost-effective and resistant to corrosion but is typically used for drain lines rather than supply lines due to potential health concerns with drinking water.
When mixing materials, use dielectric unions to prevent galvanic corrosion between dissimilar metals. Always check local building codes, as some areas may have restrictions on certain pipe materials.
Updating shut-off valves and supply lines
Replacing old shut-off valves and supply lines is a smart move when installing new fixtures. Modern quarter-turn ball valves are more reliable and easier to operate than older gate valves. For supply lines, consider flexible braided stainless steel hoses, which are less prone to leaks and bursting compared to rigid pipes or older rubber hoses.
When installing new valves, use Teflon tape or pipe thread compound on the threads to ensure a watertight seal. Position valves in easily accessible locations to facilitate future maintenance or emergencies.
Rough-in measurements for modern fixtures
Accurate rough-in measurements are critical for proper fixture installation. The rough-in distance for toilets, typically 12 inches but sometimes 10 or 14 inches, measures from the wall to the center of the waste pipe. For sinks and faucets, measure the distance between the supply lines and the drain. Shower valve rough-ins usually require a depth of 2-3 inches from the finished wall surface.
Use a tape measure and level to mark these measurements precisely. Remember that some modern fixtures, particularly wall-mounted toilets, may require additional support structures behind the wall. Always consult the manufacturer’s specifications for exact rough-in requirements.
Advanced installation techniques for specific fixtures
Modern bathroom fixtures often require specialized installation techniques to ensure proper functionality and longevity. Let’s explore some advanced methods for installing popular contemporary fixtures:
Wall-mounted toilets: carrier systems and load-bearing requirements
Wall-mounted toilets offer a sleek, space-saving design but demand careful installation. The key component is the carrier system, a heavy-duty frame installed inside the wall that supports the toilet and houses the tank. These systems typically require a minimum wall thickness of 6 inches to accommodate the frame and plumbing.
When installing a wall-mounted toilet:
- Ensure the wall can bear the load (typically 500 pounds or more)
- Use a laser level to ensure perfect alignment of the carrier system
- Install additional blocking between studs for reinforcement
- Carefully follow manufacturer guidelines for mounting height and waste pipe connection
Remember, precise installation is crucial not only for aesthetics but also for preventing leaks and ensuring proper flushing performance.
Freestanding tubs: leveling and drain alignment
Freestanding tubs are a luxurious addition to any bathroom but require meticulous installation. The floor must be capable of supporting the tub’s weight when filled with water and an occupant, which can exceed 1,000 pounds. Use a high-quality level to ensure the tub is perfectly level in all directions.
For drain alignment, consider using a flexible drain pipe to allow for minor adjustments. Some modern freestanding tubs come with integrated overflow systems that require specific installation techniques. Always use a waterproof membrane underneath the tub to protect the subfloor from potential water damage.
Smart showers: integrating digital controls and multiple outputs
Smart shower systems offer customizable experiences but involve complex installation processes. These systems often include digital controls, multiple showerheads, body sprays, and even steam generators. Key considerations include:
- Ensuring adequate water pressure and volume for multiple outputs
- Proper waterproofing around digital control panels
- Correct wiring for power supply and data transmission
- Calibration of temperature sensors for accurate control
Many smart shower systems require a dedicated control box, which should be installed in an accessible location for maintenance. Use low-voltage wiring for control panels and ensure all electrical components are properly grounded and protected from moisture.
Vessel sinks: countertop modifications and faucet placement
Vessel sinks sit atop the countertop, requiring specific modifications for installation. The countertop needs a smaller hole compared to traditional drop-in sinks, typically just large enough for the drain. Ensure the countertop material is strong enough to support the sink’s weight and any potential impact.
Faucet placement is crucial with vessel sinks. Measure carefully to ensure the faucet spout extends far enough over the sink basin without overshooting. Wall-mounted faucets are a popular choice with vessel sinks, but require precise installation to align properly with the sink.
Proper installation of modern fixtures not only enhances their performance but also contributes significantly to the overall aesthetics and functionality of your bathroom.
Waterproofing and sealing methodologies
Effective waterproofing is paramount in bathroom installations to prevent water damage and mold growth. Modern techniques offer superior protection compared to traditional methods. Let’s explore some advanced waterproofing and sealing strategies:
Membrane systems: sheet vs. liquid applied
Waterproof membranes are essential in wet areas like showers and around tubs. Two primary types are available: sheet membranes and liquid-applied membranes. Sheet membranes, such as those made from polyethylene, offer consistent thickness and are ideal for large, flat surfaces. They’re typically applied with a special adhesive and require careful sealing at joints and corners.
Liquid-applied membranes, on the other hand, are more versatile and can conform to irregular shapes more easily. They’re applied with a roller or brush and form a seamless barrier when cured. Some advanced formulations even include crack-bridging properties to accommodate minor substrate movement.
When choosing between sheet and liquid membranes, consider factors such as the complexity of the surface, the level of substrate movement expected, and the installer’s experience. In many cases, a combination of both types may provide the best protection.
Grout sealing techniques for longevity
Grout, particularly in shower areas, is vulnerable to water penetration and staining. Modern grout sealers offer enhanced protection and longevity. Epoxy-based sealers provide excellent water resistance and durability but can alter the grout’s appearance slightly. Penetrating sealers, which soak into the grout, offer good protection without changing the grout’s look.
For optimal results:
- Ensure grout is fully cured before sealing (typically 48-72 hours)
- Clean the grout thoroughly and allow it to dry completely
- Apply sealer in thin, even coats using a foam brush or applicator
- Allow each coat to dry before applying the next (usually 2-3 coats)
- Avoid water contact for at least 24 hours after the final coat
Consider using pre-sealed grout or epoxy grout for areas with high moisture exposure, as these offer superior water resistance from the outset.
Silicone application: best practices for fixture edges
Proper silicone application is crucial for sealing edges around fixtures, preventing water ingress. Use a high-quality, mold-resistant silicone caulk specifically designed for bathroom use. Before application, clean and dry the surfaces thoroughly, removing any old caulk or debris.
To achieve a professional finish:
- Use painter’s tape to mask off areas adjacent to the joint for clean lines
- Cut the nozzle at a 45-degree angle for better control
- Apply steady pressure for an even bead of silicone
- Smooth the silicone immediately with a wet finger or caulking tool
- Remove the tape before the silicone starts to skin over
For joints subject to movement, such as where a tub meets the wall, use a backer rod in the gap before applying silicone. This ensures the silicone adheres only to the sides of the joint, allowing for better flexibility and longevity.
Electrical considerations for modern bathroom fixtures
The integration of electrical components in modern bathroom fixtures requires careful planning and adherence to safety standards. From GFCI protection to low-voltage lighting, understanding these electrical considerations is crucial for a safe and functional bathroom installation.
GFCI protection: placement and circuit requirements
Ground Fault Circuit Interrupter (GFCI) protection is mandatory for all bathroom electrical outlets and lighting circuits. GFCI devices quickly cut power in case of a ground fault, preventing electrical shocks in wet environments. In modern installations, consider using GFCI circuit breakers at the panel, which protect the entire circuit, rather than individual GFCI outlets.
Key points for GFCI installation:
- Install GFCI protection within 6 feet of all water sources
- Use weather-resistant GFCI outlets for added durability
- Ensure proper grounding of all electrical boxes and fixtures
- Test GFCI devices monthly to ensure proper functioning
Remember, even low-voltage systems like heated towel racks should be connected to GFCI-protected circuits for maximum safety.
Low-voltage lighting integration in shower enclosures
Incorporating lighting into shower enclosures can enhance both functionality and ambiance. Low-voltage LED lighting systems are ideal for this application due to their energy efficiency and safety in wet environments. When installing shower lighting:
- Use fixtures specifically rated for wet locations
- Install a waterproof transformer outside the shower area
- Ensure all wiring connections are made in waterproof junction boxes
- Seal all penetrations through tile or shower panels with silicone
Consider using color-changing LED systems for a customizable shower experience. These can often be controlled via smartphone apps, adding a high-tech touch to your bathroom.
Wiring for heated towel racks and mirror defoggers
Heated towel racks and mirror defoggers add luxury and functionality to modern bathrooms. These devices typically operate on standard 120V circuits but should be installed on dedicated lines to prevent overloading. For towel racks, ensure the wall can support the weight when loaded with wet towels.
Mirror defoggers are thin heating elements applied to the back of the mirror. They require careful installation to ensure even heating without damaging the mirror. Always follow manufacturer guidelines for wiring and mounting these devices.
When installing these features:
- Use a timer or smart switch for energy-efficient operation
- Ensure proper clearance around heated towel racks
- Install moisture-resistant electrical boxes behind mirrors for defogger connections
Post-installation testing and troubleshooting
After installing modern bathroom fixtures, thorough testing is crucial to ensure everything functions correctly and safely. Begin by checking all water connections for leaks, running each fixture through its full range of operations. For toilets, flush multiple times to verify proper drainage and tank refill. Test shower systems at various temperatures and flow rates to ensure consistent performance.
For electrical components, verify that all GFCI devices trip when tested and reset properly. Check heated towel racks and mirror defoggers for even heating. With smart shower systems, run through all programmed settings to ensure proper function of digital controls and multiple outputs.
Common issues to watch for include:
- Dripping faucets or showerheads, which may indicate improper sealing or faulty cartridges
- Slow draining in sinks or showers, possibly due to improper venting or drain alignment
- Uneven heating in towel racks or mirror defoggers, which may indicate wiring issues
- Inconsistent water temperature in smart showers, possibly due to improper calibration
When troubleshooting, systematically isolate each component to identify the source of the problem. For plumbing issues, check for proper water pressure and inspect all connections. For electrical problems, ensure all wiring is correct and connections are secure. Don’t hesitate to consult the manufacturer’s documentation or customer support for specific troubleshooting steps related to smart fixtures.
Remember, some modern fixtures may require a « breaking-in » period or fine-tuning after installation. For instance, digital shower systems might need recalibration after a few uses to account for your home’s specific water pressure and temperature fluctuations. Similarly, smart toilets may require adjustments to their flush sensors based on usage patterns.
Thorough testing and prompt troubleshooting not only ensure the proper functioning of your newly installed fixtures but also help prevent potential water damage and extend the life of your bathroom renovation.
Lastly, consider creating a maintenance schedule for your new fixtures. Many modern bathroom components, especially those with electronic elements, benefit from regular check-ups and cleaning. This proactive approach can help you catch and address minor issues before they become major problems, ensuring your newly renovated bathroom remains functional and beautiful for years to come.