Transforming old or outdated furniture with paint is a fantastic way to breathe new life into your home decor without breaking the bank. This approach not only saves money but also allows you to express your creativity and personal style. Whether you’re looking to revamp a thrift store find or give a family heirloom a fresh look, painting furniture offers endless possibilities for customization and design.
The art of furniture upcycling through paint has gained significant popularity in recent years, with DIY enthusiasts and professional designers alike embracing this versatile technique. By mastering the skills of furniture painting, you can create unique pieces that perfectly complement your home’s aesthetic while also contributing to a more sustainable lifestyle by repurposing existing items.
Analyzing paint types for furniture upcycling
Choosing the right paint is crucial for achieving a professional-looking finish on your furniture makeover project. There are several types of paint specifically formulated for furniture, each with its own set of characteristics and benefits. Understanding these options will help you select the best paint for your specific project and desired outcome.
Chalk paint has become increasingly popular for furniture upcycling due to its matte finish and excellent adhesion properties. This type of paint often requires minimal surface preparation, making it an excellent choice for beginners. Chalk paint is known for its ability to create a vintage or shabby chic look, perfect for distressing techniques.
Milk paint, another favorite among furniture painters, is an environmentally friendly option that comes in powder form and is mixed with water before use. It provides a unique, somewhat unpredictable finish that can enhance the character of older pieces. Milk paint is ideal for achieving an authentic antique look and can be sealed with wax or oil for added durability.
For a more durable and washable finish, acrylic paint is an excellent choice. It adheres well to most surfaces and is available in a wide range of colors and sheens. Acrylic paint is particularly suitable for furniture that will see heavy use, such as kitchen tables or children’s bedroom sets.
Oil-based paints, while less common for DIY projects due to their longer drying times and strong odor, offer superior durability and a smooth finish. They’re often used for high-end furniture restorations where a flawless, long-lasting result is desired.
Surface preparation techniques for optimal paint adherence
Proper surface preparation is essential for achieving a professional-looking and long-lasting paint finish on your furniture. Skipping or rushing through this step can lead to poor paint adhesion, an uneven finish, or premature peeling. The level of preparation required depends on the furniture’s current condition and the type of paint you plan to use.
Sanding methods: orbital vs. hand sanding for different wood types
Sanding is often the first step in preparing a surface for paint. It helps to smooth out imperfections and create a surface that paint can easily adhere to. The choice between orbital sanding and hand sanding depends on the furniture’s size, shape, and wood type.
Orbital sanders are efficient for large, flat surfaces and can quickly remove old finishes or smooth out rough spots. They’re particularly useful for hardwoods like oak or maple. However, for intricate details or softer woods like pine, hand sanding offers more control and reduces the risk of damaging the wood.
When hand sanding, start with a coarser grit sandpaper (around 80-120) to remove any existing finish or smooth out rough areas. Gradually progress to finer grits (220-320) for a smoother surface. Always sand in the direction of the wood grain to avoid visible scratches.
Deglossing strategies for laminate and veneer surfaces
Laminate and veneer surfaces present unique challenges when it comes to paint adhesion. These materials are often glossy and non-porous, making it difficult for paint to bond effectively. Deglossing is a crucial step in preparing these surfaces for paint.
One effective deglossing method is to use a liquid deglosser, also known as liquid sandpaper. This chemical solution etches the surface, creating a rougher texture that paint can adhere to. Apply the deglosser with a lint-free cloth, following the manufacturer’s instructions carefully.
For a more eco-friendly approach, you can create a deglossing solution using equal parts vinegar and water. While not as powerful as commercial deglossers, this mixture can help remove some of the shine and prepare the surface for priming.
Priming essentials: oil-based vs. water-based primers
Priming is a critical step in furniture painting, especially when working with raw wood, stained surfaces, or when making dramatic color changes. The choice between oil-based and water-based primers depends on the surface material and the type of paint you’ll be using.
Oil-based primers offer excellent adhesion and stain-blocking properties. They’re ideal for raw wood, as they can seal the grain and prevent tannins from bleeding through the paint. However, they have a strong odor and require longer drying times.
Water-based primers, on the other hand, dry quickly and have low VOC emissions, making them more environmentally friendly. They work well on most surfaces and are compatible with both latex and acrylic paints. For furniture that may have water stains or knots, look for a water-based primer with stain-blocking properties.
Application methods: brush, roller and spray painting furniture
The method you choose for applying paint to your furniture can significantly impact the final result. Each technique has its advantages and is suited to different types of furniture and paint finishes. Understanding these methods will help you achieve the best possible outcome for your project.
Brush selection: natural vs. synthetic bristles for various paint formulas
Choosing the right brush is crucial for achieving a smooth, professional-looking finish. The type of bristles you select should complement the paint you’re using and the surface you’re painting.
Natural bristle brushes, typically made from animal hair, are ideal for oil-based paints and varnishes. They’re known for their ability to hold more paint and create a smooth finish. However, they’re not suitable for water-based paints as they can absorb water and become limp.
Synthetic bristle brushes, made from materials like nylon or polyester, are versatile and work well with both water-based and oil-based paints. They maintain their shape better when used with water-based products and are generally easier to clean. For furniture painting, look for high-quality synthetic brushes with flagged (split) ends, which help to reduce brush marks.
When painting furniture, use a 2-inch angled brush for cutting in edges and details, and a 4-inch flat brush for larger surfaces. Always brush in the direction of the wood grain for the smoothest finish.
Foam roller techniques for smooth finish on flat surfaces
Foam rollers are excellent for achieving a smooth, even finish on large, flat surfaces such as tabletops, cabinet doors, or dresser drawers. They’re particularly effective when using latex or acrylic paints.
To use a foam roller effectively:
- Pour a small amount of paint into a roller tray.
- Lightly dip the roller into the paint, ensuring even coverage.
- Roll off excess paint on the tray’s ridged area to prevent drips.
- Apply paint to the furniture surface using light, even pressure.
- Work in small sections, overlapping slightly with each pass.
For the best results, use a high-density foam roller with a smooth surface. These rollers leave minimal texture and can create a finish that almost looks sprayed on.
HVLP spray systems for professional-grade results
High Volume Low Pressure (HVLP) spray systems offer a professional-grade finish and are particularly useful for furniture with intricate details or large pieces that would be time-consuming to paint by hand.
HVLP systems atomize paint into fine particles, creating a smooth, even coat with minimal overspray. They’re ideal for applying thin, consistent layers of paint, which is crucial for achieving a durable finish.
When using an HVLP system:
- Thin the paint according to the manufacturer’s instructions.
- Practice your technique on a piece of cardboard before starting on your furniture.
- Keep the spray gun perpendicular to the surface and about 6-8 inches away.
- Move the gun in a smooth, steady motion, overlapping each pass by about 50%.
- Apply multiple thin coats rather than one thick coat for the best finish.
While HVLP systems require some practice to master, they can produce stunning results that rival those of professional furniture refinishers.
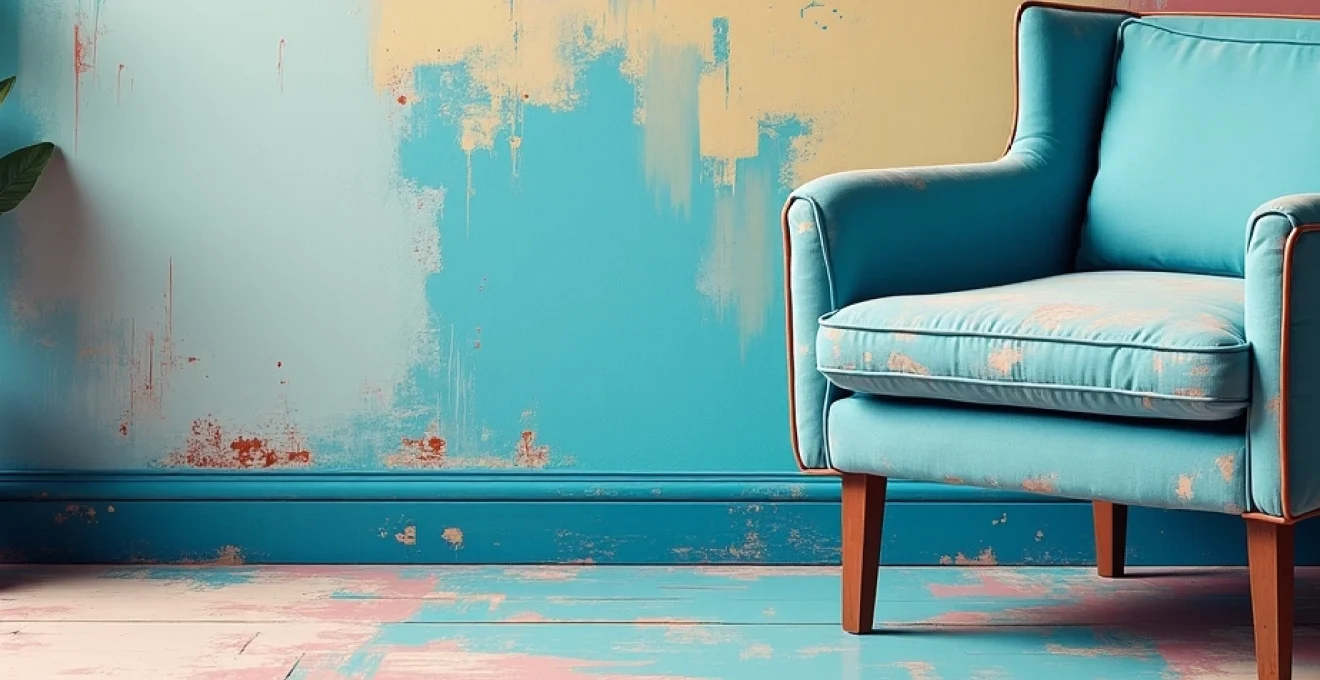
Distressing and aging techniques for vintage aesthetics
Creating a vintage or aged look on painted furniture can add character and charm to your pieces. Distressing techniques can transform a newly painted item into one that appears to have a rich history and patina. These methods are particularly popular for achieving farmhouse, shabby chic, or rustic styles.
One simple distressing technique is sanding through. After your paint has fully dried, use fine-grit sandpaper to gently wear away paint in areas that would naturally show wear over time, such as edges, corners, and around handles. This method works best when you’ve applied a base coat of a different color, allowing it to show through the top coat when distressed.
Another effective aging technique is dry brushing. This involves using a nearly dry brush with a small amount of paint to lightly brush over raised areas and details. Choose a color that contrasts with your base coat to highlight the texture and create depth. Dry brushing is excellent for enhancing carved details or creating a weathered wood appearance.
For a more dramatic aged effect, consider using crackle medium. This product is applied between two layers of paint and causes the top layer to crack as it dries, revealing the base color underneath. The size of the cracks can be controlled by the thickness of the crackle medium application, allowing you to create fine, delicate cracks or bold, chunky ones.
Milk paint naturally lends itself to a chipped, worn look, especially when applied over a non-porous surface without a bonding agent. As the paint dries, it can flake and chip in an organic way, creating an authentically aged appearance. This unpredictable quality is part of milk paint’s charm and can produce truly unique results.
Protective finishes: sealing and preserving painted furniture
Applying a protective finish is the final step in your furniture painting project, and it’s crucial for ensuring the longevity and durability of your work. The right finish can enhance the paint color, provide protection against wear and tear, and make the surface easier to clean.
Wax vs. polyurethane: choosing the right topcoat
The choice between wax and polyurethane as a topcoat depends on the furniture’s intended use and the look you want to achieve. Each option has its own set of advantages and considerations.
Wax finishes, particularly popular for chalk-painted furniture, offer a soft, matte look that enhances the vintage or rustic appeal of a piece. They’re easy to apply and can be buffed to varying levels of sheen. Wax provides a protective layer that resists minor scratches and spills. However, it requires reapplication every 6-12 months, especially on high-use surfaces.
Polyurethane, available in both water-based and oil-based formulations, provides a more durable and long-lasting finish. It’s ideal for furniture that will see heavy use or exposure to moisture. Water-based polyurethane dries clear and maintains the color of your paint, while oil-based versions can add a slight amber tint, which may be desirable for warm color schemes.
Application methods for even protective layer distribution
Proper application of your chosen protective finish is key to achieving an even, long-lasting result. The method you use will depend on the type of finish and the size and shape of your furniture piece.
For wax finishes:
- Apply a thin layer of wax using a lint-free cloth or wax brush.
- Work in small sections, rubbing the wax into the paint in circular motions.
- Allow the wax to dry for about 15-20 minutes.
- Buff the surface with a clean cloth to achieve your desired sheen.
- For additional protection, apply a second thin coat after 24 hours.
For polyurethane finishes:
- Stir the polyurethane gently; do not shake to avoid creating bubbles.
- Apply thin, even coats using a high-quality brush or foam applicator.
- Work in the direction of the wood grain, maintaining a wet edge to prevent lap marks.
- Allow each coat to dry completely and lightly sand between coats with fine-grit sandpaper.
- Apply 2-3 coats for optimal protection, allowing full curing time as per the product instructions.
Curing times and environmental factors affecting finish durability
Understanding curing times is crucial for ensuring the longevity of your painted and finished furniture. While many finishes may feel dry to the touch within hours, full curing can take significantly longer.
Wax finishes typically cure within 24-48 hours, but it’s best to wait a full week before placing heavy items on the surface. Polyurethane finishes can take up to 30 days to fully cure, although they can usually be lightly used after 24-48 hours.
Environmental factors play a significant role in the curing process:
- Temperature: Ideal curing conditions are between 70-80°F (21-27°C).
- Humidity: High humidity can significantly extend drying and curing times.
- Ventilation: Good air circulation helps finishes dry and cure more evenly.
To ensure the best possible outcome, allow your freshly painted and finished furniture to cure in a clean, dry environment with good air circulation. Avoid placing heavy objects, exposing the piece to moisture, or cleaning it with anything other than a dry cloth during the curing period.